Private (Standalone) Monitors
Last updated: 2026-06-12
A private monitor (also called a standalone monitor) runs checks and sends alerts exactly like any other monitor, but it is not attached to a status page and does not appear in any public view.
Use a private monitor when:
- You want to monitor an internal service or staging environment
- You need alerting without exposing the endpoint on a customer-facing status page
- You are testing a new target before deciding whether to publish it
- You moved a service off your status page but still need to keep monitoring it
Requirements
Private monitors require a paid plan. Free plans do not include standalone monitor slots.
Quota
Private monitors use a separate quota calculated from your plan’s per-page monitor limit:
Standalone slots = floor(monitors per page / 3)
| Plan tier | Monitors per page | Standalone slots |
|---|---|---|
| Starter | 10 | 3 |
| Growth | 25 | 8 |
| Business | 50 | 16 |
Page-attached monitors do not count toward the standalone quota, and standalone monitors do not count toward the per-page limit.
How to Create a Private Monitor
- Go to Monitors → Add Monitor.
- In the Status Page dropdown, select None — private monitor (alerts only).
- Fill in the rest of the form as normal.
- Click Create Monitor.
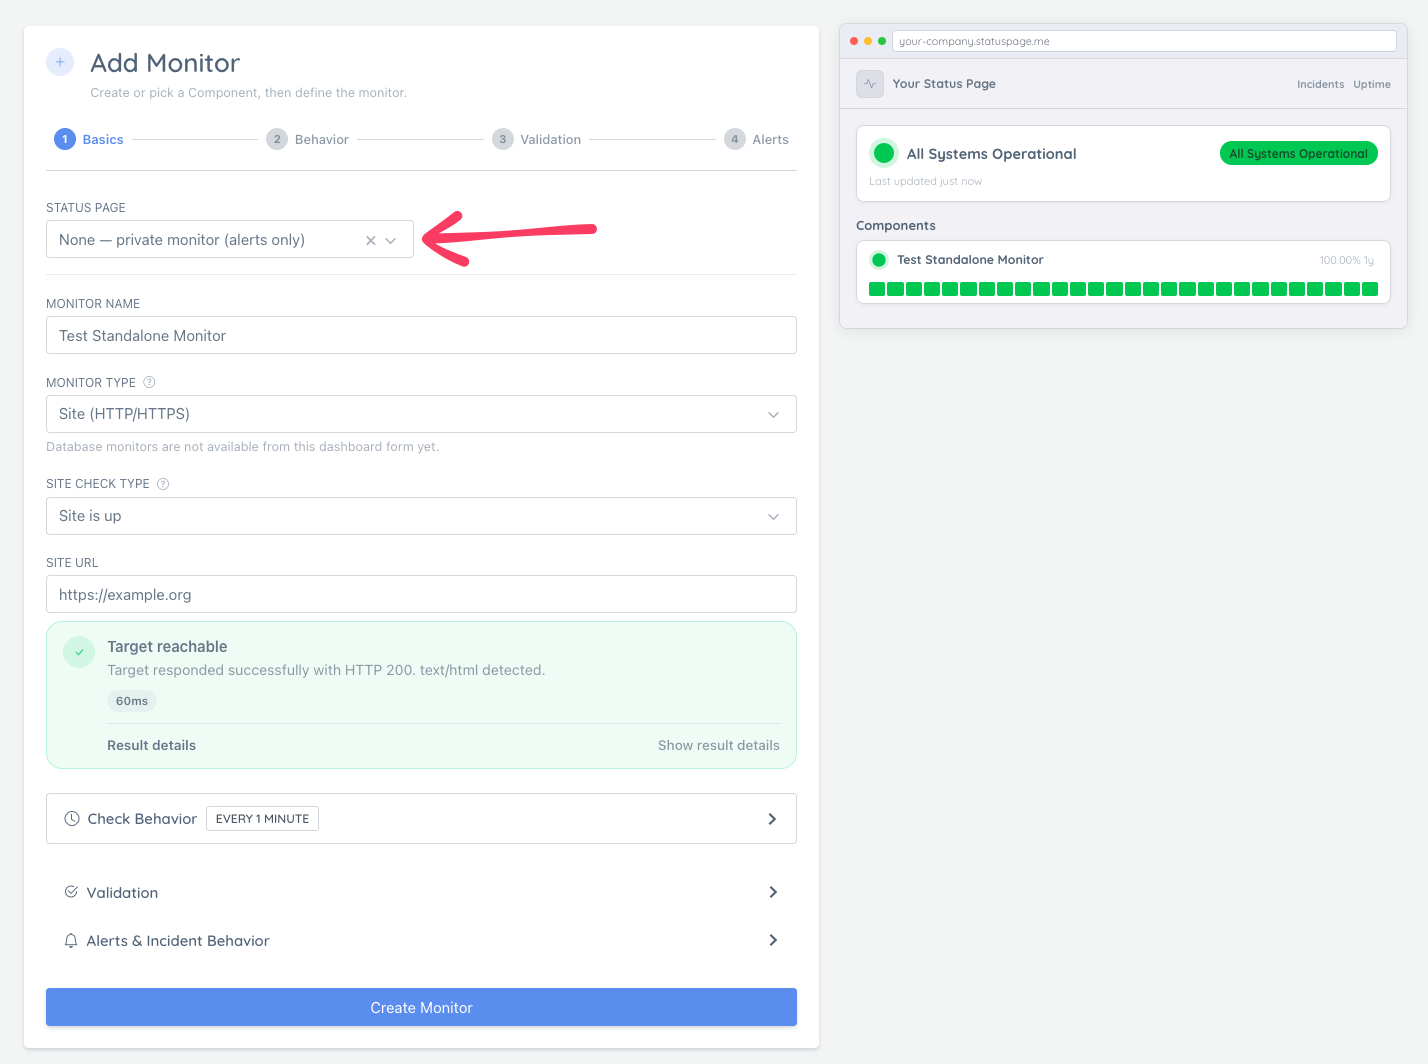
After creation you will see a confirmation that the monitor is active as a private monitor.
How Private Monitors Appear in the Dashboard
Flat view (Card or Compact): A muted Private badge appears where the status page link normally shows.
Grouped view (Group by: Status Page): Private monitors appear at the top under a Private monitors — alerts only group header, separate from page-grouped monitors.
In Card View, private monitors show a Notifications button (instead of Alerts) that opens the channel picker directly — because there is no alerts history page to link to.
Detaching a Monitor from a Status Page
You can convert any existing page-attached monitor into a private monitor at any time. The monitor keeps running, keeps its history, and keeps sending alerts — it simply disappears from the public status page.
From the Monitors list (kebab menu)
- Open Monitors → Monitors.
- Find the monitor and open its ⋮ kebab menu (far right of the row).
- Click Make Private.
- Confirm in the dialog.
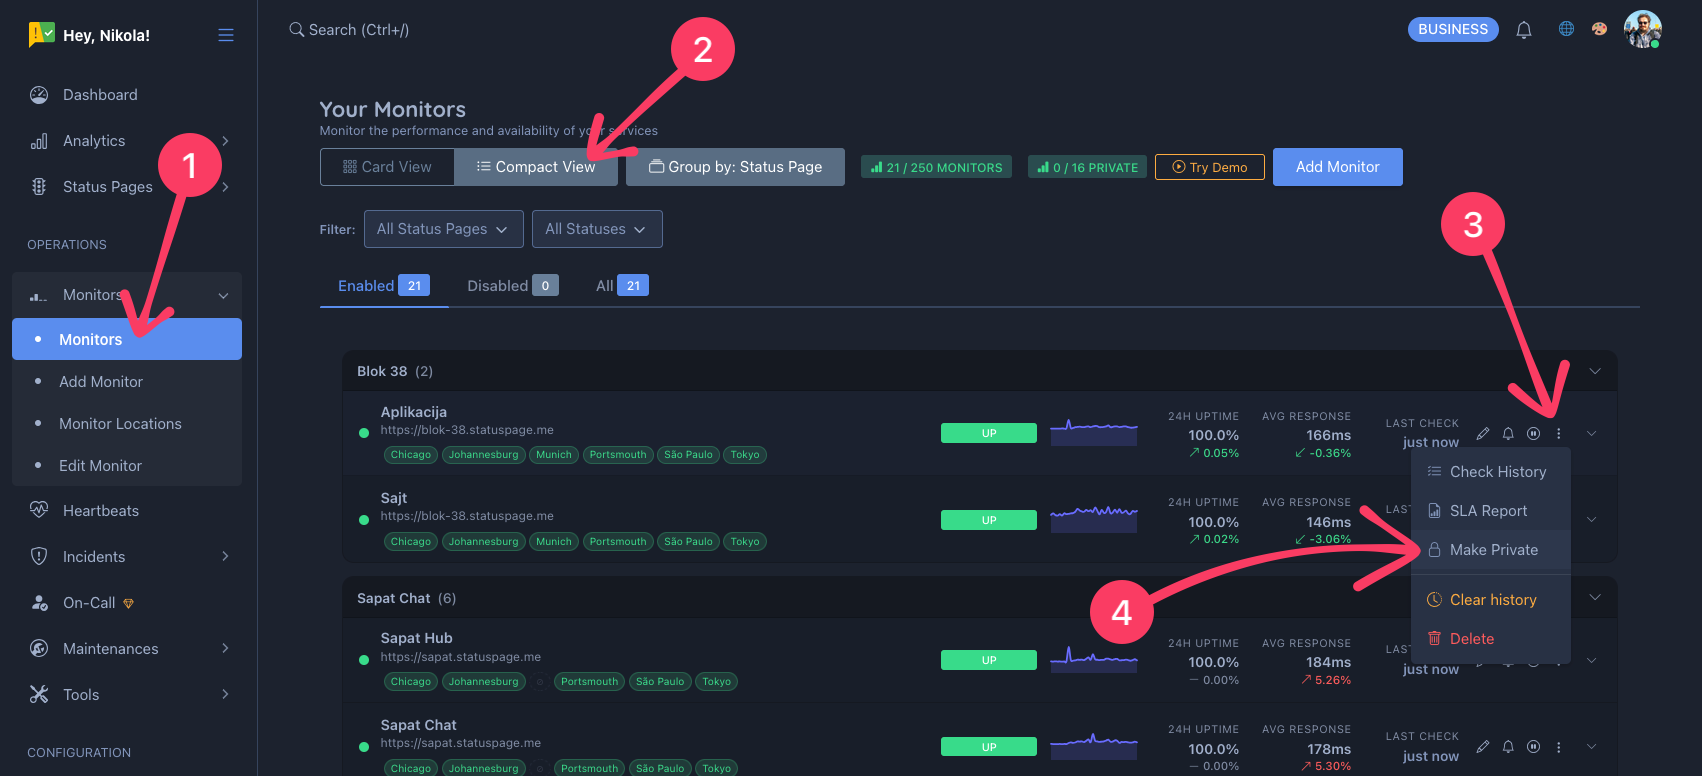
The page reloads and the monitor moves to the Private monitors — alerts only group.
From the Edit Monitor page
- Open the monitor’s Edit page.
- Scroll to the bottom of the sidebar.
- Click Detach from Status Page.
- Confirm in the dialog.
The monitor is immediately detached and the page reloads in private-monitor mode. The Notification Channels card will appear so you can assign per-monitor alert channels.
What happens to the status page? The component that the monitor was attached to remains on the status page — it just loses its automated status feed. You can remove the component separately from Status Page Settings if you no longer need it.
Publishing a Private Monitor to a Status Page
To move a private monitor onto a status page, you can either repeat the steps for making a monitor private but in reverse, or you can edit the monitor and select a status page and component to attach it to:
- Open the monitor’s Edit page.
- Select a Status Page in the form.
- Select the Component you want the monitor to drive.
- Save the monitor.
Warning: Selecting a component on a private monitor will move it to the public status page. A confirmation dialog appears before the save goes through so you can review the change.
After publishing, go to Status Page Settings → Monitors to configure public visibility and sort order.
Alerts
Private monitors fire alerts exactly like page-attached monitors. The only difference is that downtime is not reflected on any public status page.
Because a private monitor has no status page to inherit channels from, you choose alert channels per monitor:
- Open the monitor’s Edit page.
- In the Notification Channels card, click Configure.
- Check the channels that should receive alerts for this monitor.
- Click Save.
The card updates immediately to show the linked channels (type, name, and destination — e.g. email address or Slack channel). You can also open the channel picker from the Notifications button in Card View or the bell icon in Compact View on the Monitors list.
If you have no channels configured yet, the card shows a Configure Alert Channels button and a link to create channels.
See also: Notification Channels Overview
Deleting a Private Monitor
Private monitors can be deleted from their Edit page like any other monitor. Deletion is permanent and removes all check history.